Last time, I showed you how to back up your Microsoft 365 data to Azure Storage. Of course, a good backup policy requires you to be able to restore the data! Let’s explore the process.
Accessing Backups
Once again, start on the Admin portal (https://admin.microsoft.com). You’ll need to log in using an account with the appropriate permissions. This account should have an Owner, Global Administrator, or Backup Administrator role assigned. I’ll dig deeper into Roles and Role-Based Access Control (RBAC) in a separate post soon!
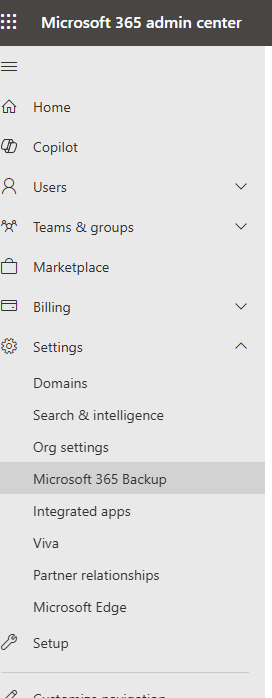
On the Admin site, select Settings and Microsoft Backup from the Menu on the left.
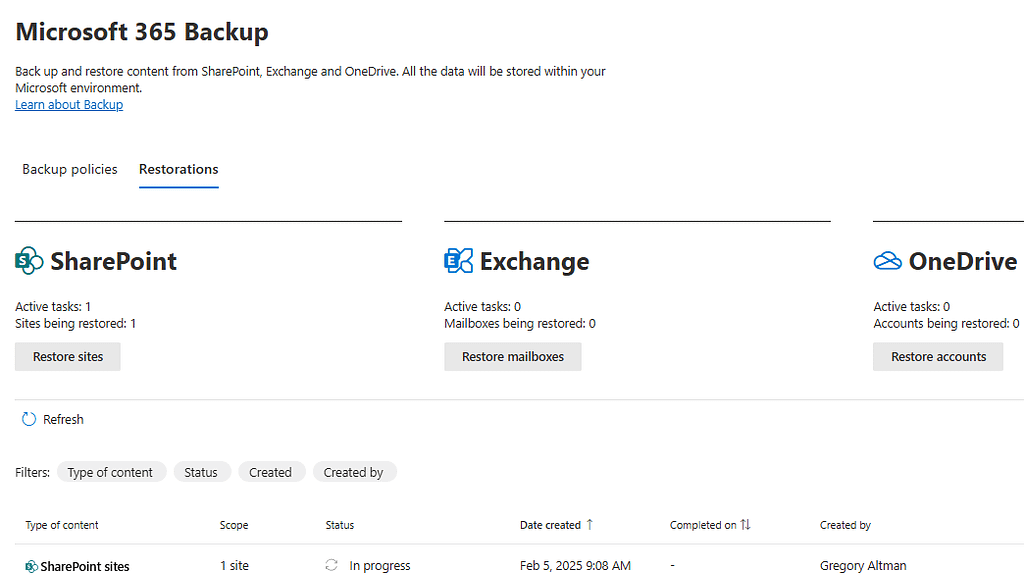
Once on the Backups page, select the Restorations link near the top. It should look similar to this:
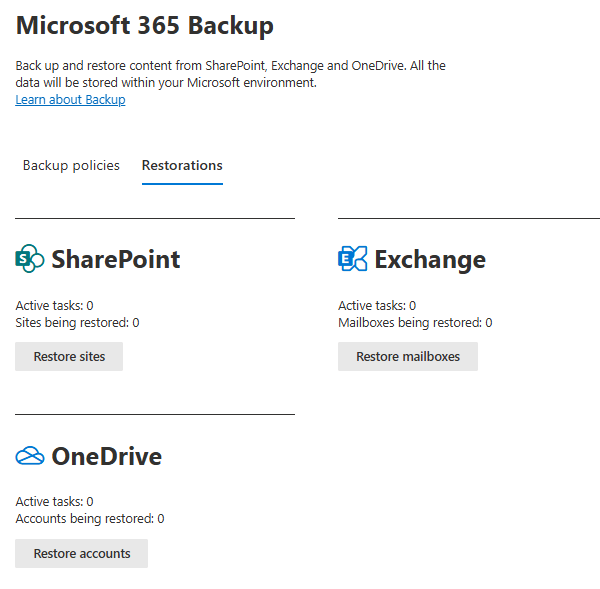
Now, you have three paths to follow, depending on what you are trying to restore. The good news is that they are all very similar, so once you’ve gone through one, the rest will be very intuitive. There are some caveats along the way, but we’ll discuss each as we get to them.
SharePoint Restoration
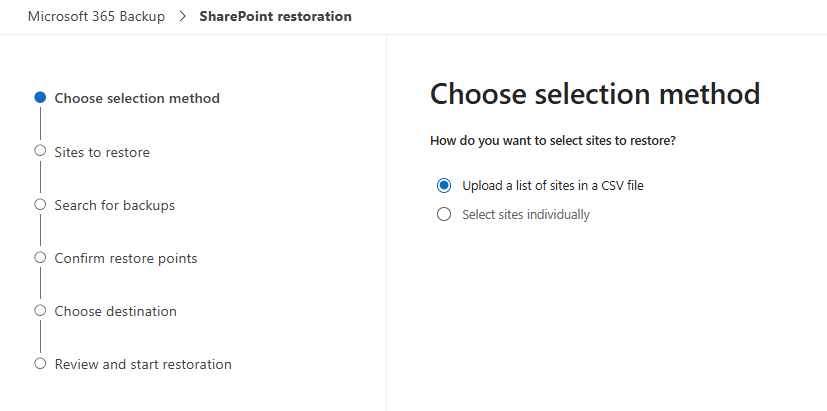
As you may recall from last time, SharePoint sites include both SharePoint Online sites and Teams sites and files. Start by clicking the “Restore Sites” button under the SharePoint heading to launch the restoration process.
First, you’ll be asked to choose a method for selecting which site or sites you wish to restore. This is pretty straightforward. You can either upload a list in CSV format or select from a list in the next step. The CSV format is pretty basic, just one URL per line. For simplicity’s sake, we will choose our sites individually. Click the radio button and then click Next at the bottom of the screen.
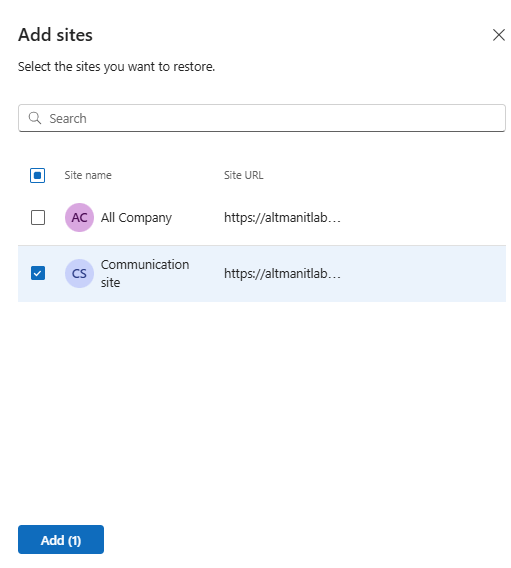
On the Sites to restore page, click the Add sites button. a “fly-out pane” will appear with a list of sites. you can either search or scroll through the list of sites. Click the checkbox next to the ones to restore. When you’ve selected all the sites to restore, click the Add button at the bottom.
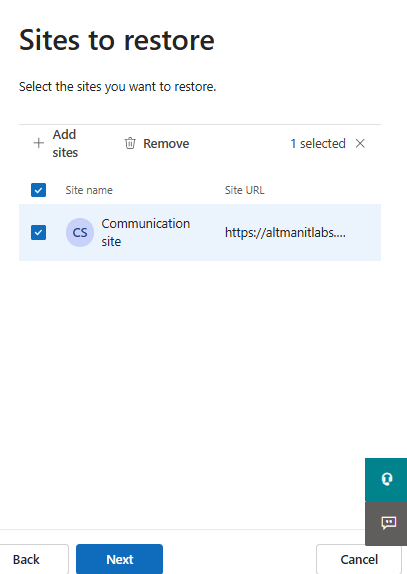
After clicking Add, you’ll be presented with a list of the sites you selected. Double-check that everything you want to restore is selected and check the boxes next to each one, or check the box at the top to select all sites listed. Once your selections are made, click Next.
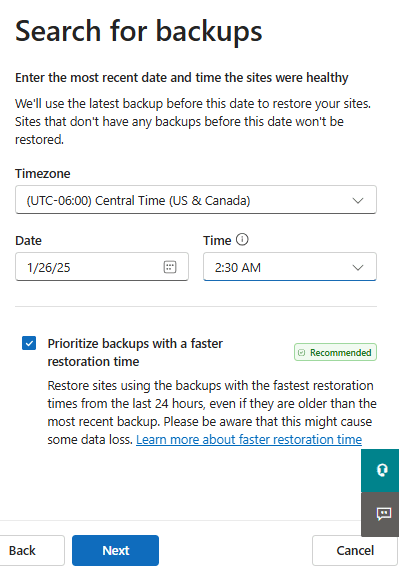
The next step is to choose the correct backup to restore. Make sure the time zone is set correctly (it defaults to your current time zone), then choose the date and time of the backup to restore. The time doesn’t need to be exact, just close to the right time. The closest backup to the time you selected will be automatically chosen. Click Next to proceed to Choosing the exact restore point.
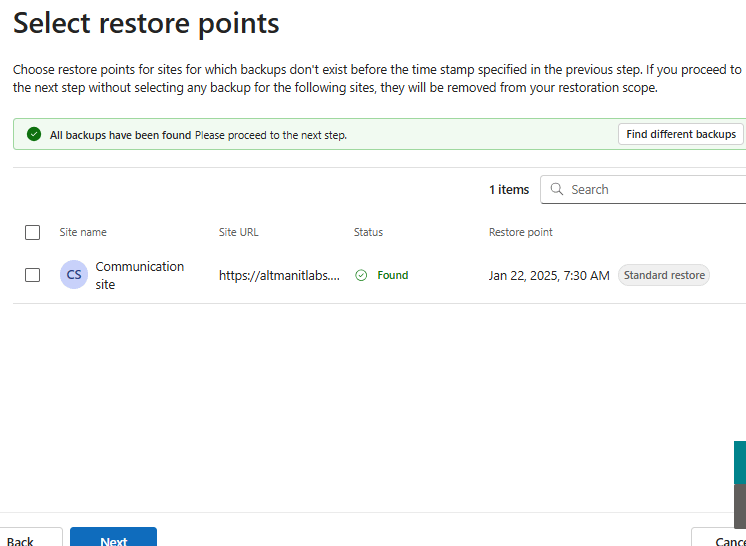
The Select Restore Points page will list the closest backup to the date/time you chose earlier. If this is NOT the restore point you wanted, click the “Find different backups” button to narrow down the date and time of the desired restore point. If the restore point listed is correct, click the checkbox next to it and then Next.
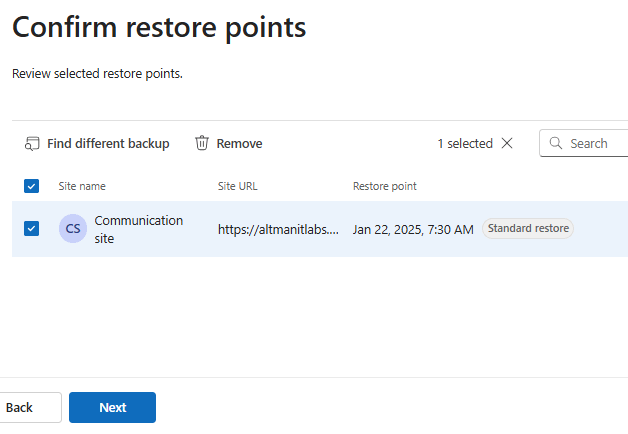
The next page will ask you to confirm the restore point you previously selected. To verify that everything is correct, click the checkbox and then Next. If you spot an error, you have the option of “Find different backup.”
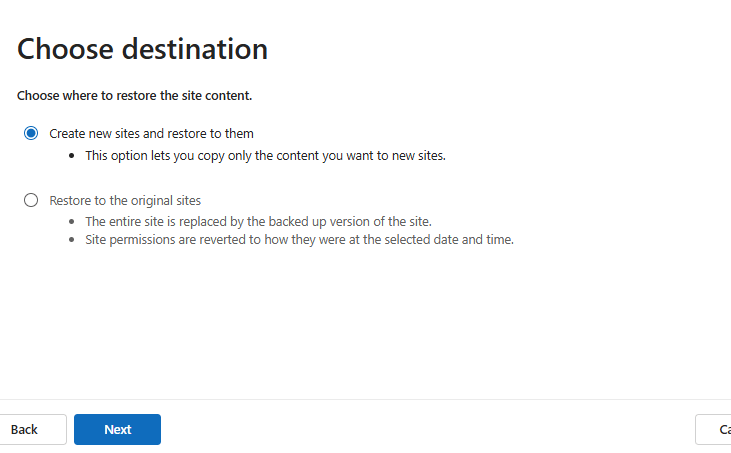
Now it’s time to choose where to put the restored site. This requires a bit of planning. The options are to create a new site for the restored content or to restore to the original site or sites. Be careful here because if you restore to the original site, all changes made since the backup will be lost, including changes to the permissions for the site.
The other option is to create a new site and restore the backup to the new site. This is usually preferable because you can copy only the content you want to restore to the original site. Click Next to continue.
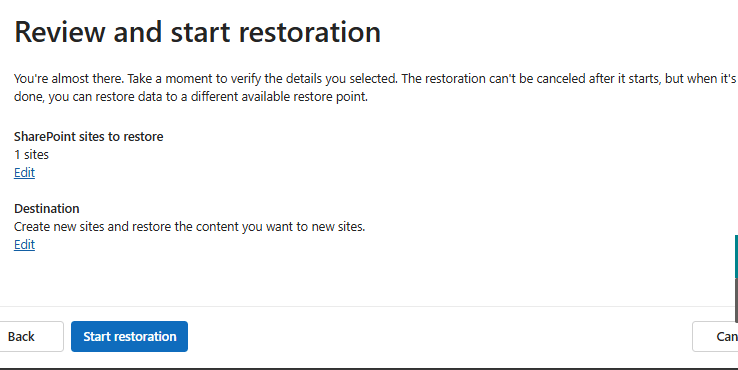
The final step is to review your choices and start the restoration process. Once the task is created, you’ll get a confirmation screen. Click Done to go back to the Backups page
Scroll down on the backups page to see a list of restorations and their progress.
Once it’s done, you can click on the entry to see the path to the restored site and browse to it and retrieve the desired content.
Restoring Exchange Mailboxes
The process of restoring Exchange mailboxes is much like the process of restoring SharePoint sites, with a few minor differences. Start by clicking the “Restore mailboxes” button on the Backup Restorations page. The next two steps are exactly like the ones for SharePoint (except, of course, you’re choosing mailboxes, not sites). Choose to select with a CSV file or individually from a list, click next, Click Add mailboxes, and select the mailbox to restore.
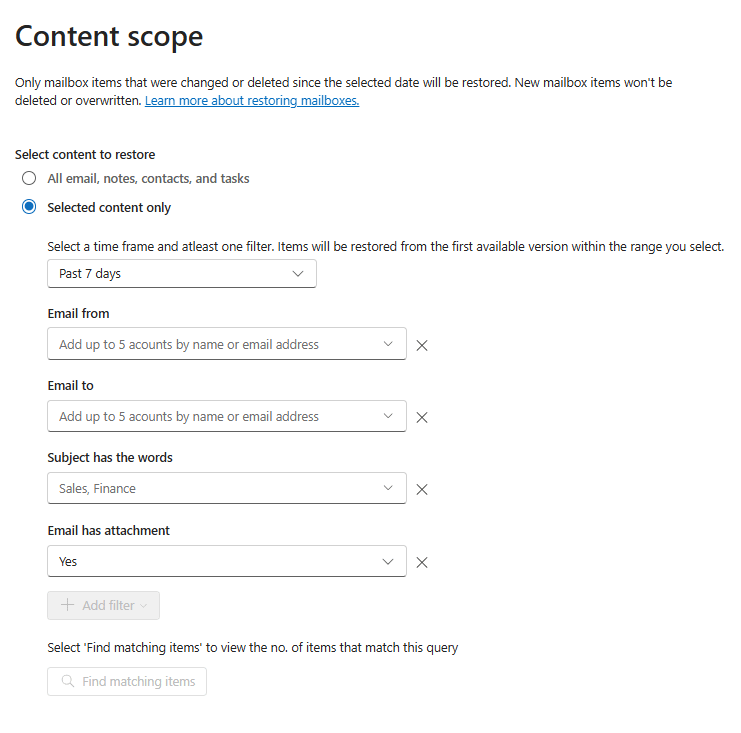
The content scope is where things get a little different. Unlike SharePoint sites, restoring a mailbox doesn’t delete or overwrite new content. Only items that were deleted or changed after the backup date are restored by the backup. Also, you can choose to restore all emails, notes, contacts, and tasks or choose “Selected content only.” Selecting all content causes you to select a date/time and restores the latest backup before that time to restore. Choosing Selected Content asks you to select a time from the drop-down list. The options are the past 24 hours, 48 hours, 7 days, or 14 days.
Once the time is selected, you can add filters to narrow down the content restored. The filters are Email from, Email to, Email has attachment, and Subject has the words. The email to/from fields allows up to 5 accounts by name or email address. The attachment is a simple yes/no option, and the Subject line search is a comma-separated list of keywords. Once you select your filters, click the Find matching items button at the bottom.
After a brief search, you will be returned a count of items found. Obviously, in a production environment, you’ll probably have more than one item found. Here’s what it looks like:

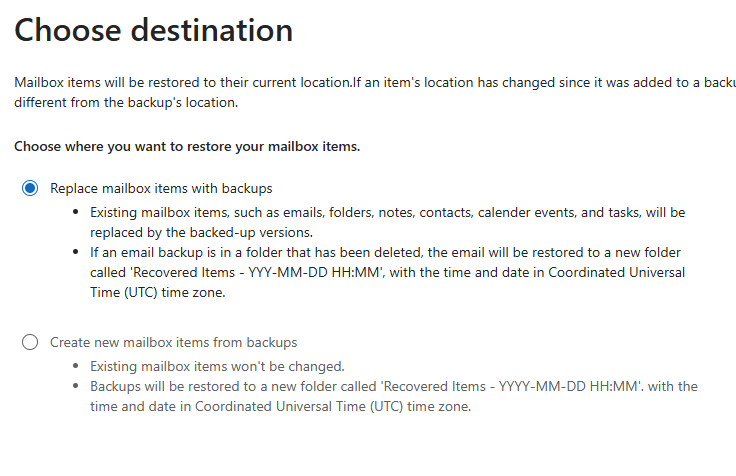
The next decision is where to put the replaced items. The options here are the same, regardless of whether you are restoring select items or all items. You can either replace items with deleted items or create new items from the backup. This requires a bit of thought and will change based on what you are trying to accomplish. For example if you have a mailbox user that accidentally deleted a few important emails and you were able to identify those with the filters we just mentioned, then sure use the first option and let the restore put the items back where they were originally.
However, if the selection information is vague, or if there is a chance that other later emails could be impacted, then the safer route is to choose the “Create new items” option. This will put all restored items in a “Recovered Items” folder with a date/time stamp. This has the benefit of separating the restored items and providing the end user with a very visible indicator of what’s been restored. Make your choice and click Next.
The next screen asks you to confirm your choices. Review them and click Start Restoration to begin the process. After a brief pause for the task to be created, you will get a confirmation screen and clicking done will take you back to the main backup screen.
Restoring OneDrive
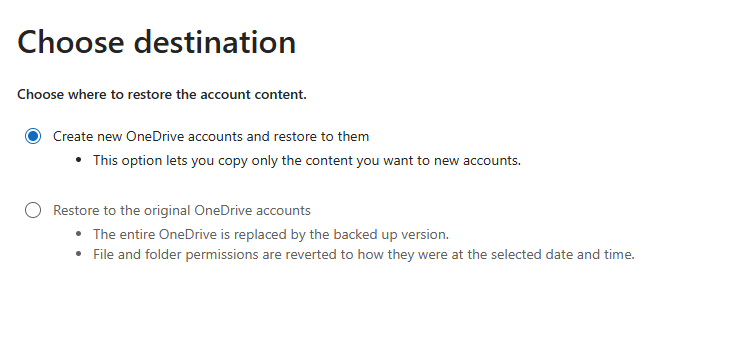
OneDrive restorations are perhaps the simplest to explain. Once you click the Restore Accounts, the next four steps are the same as SharePoint, with the sole difference being that you will select user accounts, not Sharepoint sites. The fifth step, “Choose destination,” isn’t that different either, but it’s a slightly different decision process. After all, this is an individual’s data versus a shared site. The options you have are to either Create a new OneDrive account and restore it there or restore it to the original account. The same sort of caveats apply as with SharePoint. If you restore to the original account, the entire OneDrive account will be replaced with the backed-up version, and all permissions will be reverted. This could cause a bit of a mess if the end-user has shared anything from his OneDrive. A note of warning here- they may SAY they haven’t shared anything, but if they accepted the suggestion of Outlook and shared a link to a file rather than attaching it…. yeah, they’re sharing files without realizing it.
The far safer route is to restore to a new account, give them permission to access it, and let them sort out what needs to be moved back to their production account. You’ll notice that OneDrive is an all-or-nothing restore; there is no way to filter out only one or two files. Once you make your selection, click Next
Once again, you will be asked to confirm and “Start restoration.” The task will be created, and then you will see the now familiar wait screen. Then, you can click Done to return to the main backup screen.
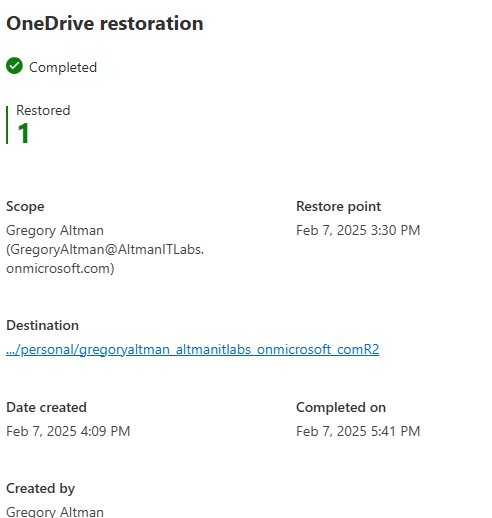
The restoration process can take several hours. Once it’s complete, you can click the entry for the backup job to get details on the restoration task.

The details flyout pane will provide details on the restoration, including a link to the restored files if you chose to create a new OneDrive account in the previous steps.
Now that you’ve restored the files, you must move them back to the original OneDrive. The restoration account doesn’t allow file changes, but an Administrator (you) can move them or remove the block manually. Following the link can be a little confusing because the restored account looks just like their regular account, except for this little banner at the top.

Getting the files back to the main OneDrive account is most easily done by selecting the files to be moved and clicking Download in the upper right. This will bundle them up and download them as a ZIP file. Then, they can unpack the ZIP file in the desired location and let OneDrive sync handle the rest.
Things to be aware of
- SharePoint sites or OneDrive accounts under a strict SEC 17a-4(f) hold will fail any attempts to do in-place restorations, preserving the hold’s immutability promise.
- OneDrive accounts and SharePoint sites being restored in-place do not have a read-only lock. If a user makes changes during the restore process, the restore will overwrite their changes. This is why restoring to a new site or account is preferable if possible.
- Site searches for SharePoint are case-sensitive.
- Mailbox draft items are not backed up.
- To restore backups for a user who has been deleted from Active Directory and Entra ID, there are some extra steps. I suggest reading Microsoft’s instructions on the matter.
Conclusion and Further Reading
Backing up and restoring data is a critical function that needs to be understood well. Today, I’ve outlined the basic scenarios to get you started. However, we all know that basic is just the beginning. There is a lot of data on Microsoft’s Learn website detailing billing, what is and is not backed up, etc.
I strongly suggest you familiarize yourself with these procedures before implementing them in a large enterprise. As always, I recommend building a small test lab account and SharePoint sites to test your methods.